
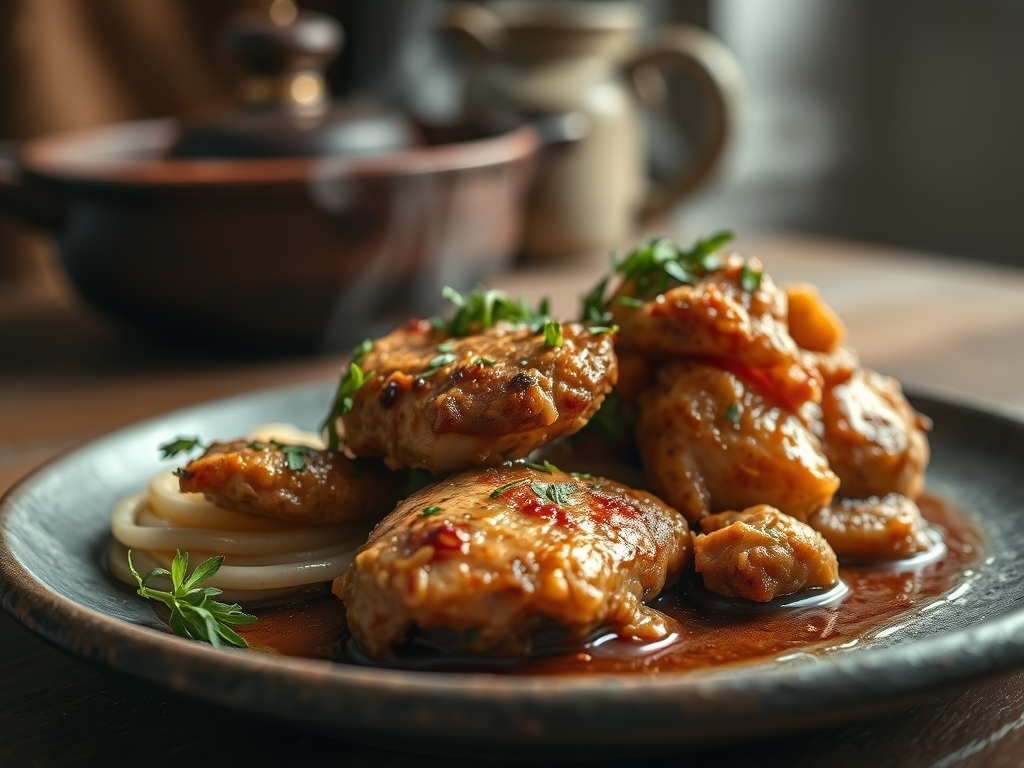
Imagine walking through your front door after a grueling day and being greeted by the scent of rendered bacon and simmering garlic. It is that specific, intoxicating aroma that makes crack chicken recipes crockpot favorites for busy families. We are not just talking about a meal; we are talking about a velvety, savory masterpiece that balances salt, fat, and acid with scientific precision. This dish has earned its reputation by being unapologetically indulgent, yet the slow cooker transforms these humble ingredients into something sophisticated. The chicken becomes so tender it practically dissolves into the sauce, while the cream cheese provides a luxurious mouthfeel that coats every bite. By leveraging the low and slow thermal energy of your crockpot, we are going to break down tough connective tissues and infuse every fiber of the protein with a piquant blend of herbs and spices. It is the ultimate culinary hug, engineered for maximum flavor with minimal effort. Grab your favorite apron; we are about to turn your kitchen into the best bistro in town.
The Gathers:
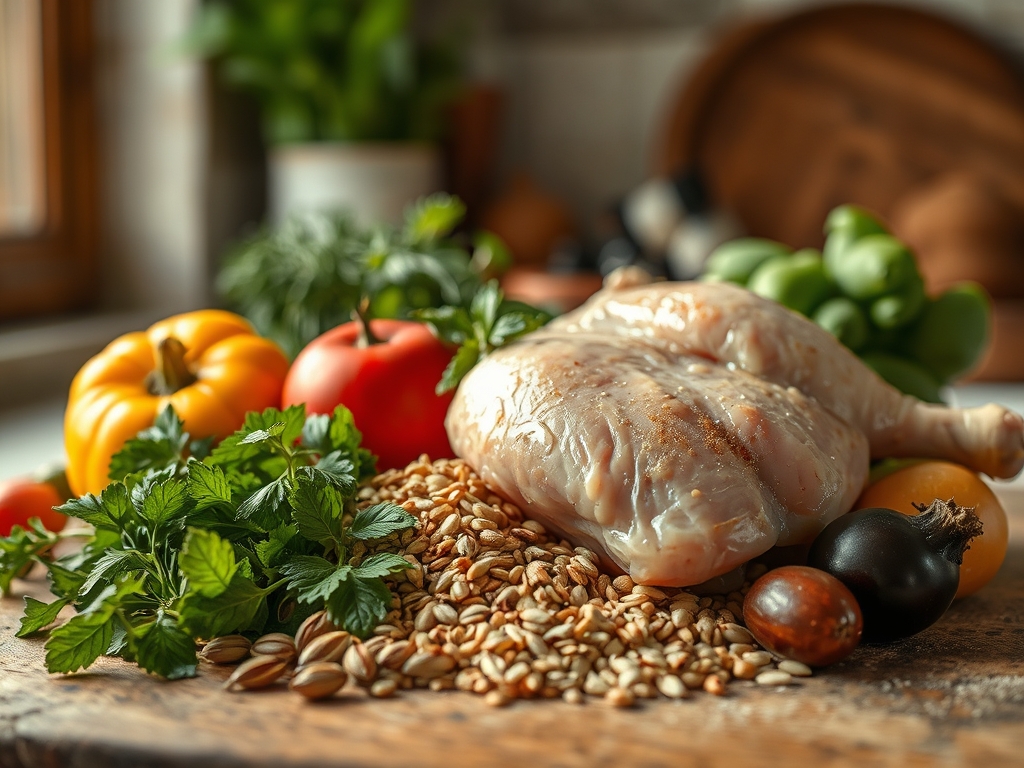
To achieve a professional grade result, your mise-en-place must be exact. We are looking for ingredients that provide a balance of viscosity and brightness. Start with two pounds of boneless, skinless chicken breasts or thighs. If you use a digital scale, aim for roughly 900 grams to ensure the liquid-to-protein ratio remains stable. You will need two eight-ounce blocks of high-fat cream cheese. Do not reach for the low-fat versions; we need the lipid content to create a stable emulsion that won't break under heat.
Next, gather your flavor bombs: one packet of ranch seasoning or a homemade blend of dried dill, parsley, onion powder, and garlic powder. For the textural contrast, you need eight strips of thick-cut bacon, rendered until crisp. Finally, one cup of shredded sharp cheddar cheese provides the necessary bite. For smart substitutions, you can swap the cheddar for a smoked gouda to add depth, or use Greek yogurt in place of half the cream cheese if you want to increase the protein-to-fat ratio, though this will slightly alter the final viscosity. Use a microplane to zest a bit of fresh lemon at the end to cut through the richness with a hit of citric acid.
The Clock
Efficiency in the kitchen is all about the "Chef's Flow." Your active prep time is a mere 15 minutes. This involves the "sear and prep" phase where you render the bacon and season the poultry. The passive cooking time is where the magic happens. On the "Low" setting, expect a duration of 6 to 7 hours. If you are in a time crunch, the "High" setting will achieve the desired internal temperature of 165 degrees Fahrenheit in about 3 to 4 hours. However, the slower method allows for superior collagen breakdown, resulting in a more succulent texture. Factor in an additional 10 minutes for the final "shred and melt" phase before serving.
The Masterclass
1. The Foundation Layer
Place your cleaned chicken breasts into the ceramic basin of the crockpot. Ensure they are in a single layer to facilitate even heat distribution. Sprinkle your ranch seasoning or spice blend evenly over the surface. Use tongs to flip the meat, ensuring every square inch is coated in the dry rub.
Pro Tip: This stage utilizes the principle of osmotic pressure. The salt in the seasoning begins to draw moisture out and then re-absorbs it, carrying the aromatics deep into the muscle fibers before the heat even begins to rise.
2. The Lipid Integration
Top the seasoned chicken with the blocks of cream cheese. Do not stir them in yet. Simply place them on top like snowy peaks. As the crockpot heats, the cheese will undergo a controlled melt, slowly basting the chicken in a bath of fats and proteins.
Pro Tip: Keeping the cheese on top prevents it from scorching against the bottom heating element. This is a form of indirect heat transfer, ensuring the dairy remains smooth rather than curdling.
3. The Low and Slow Infusion
Secure the lid and set your timer. Throughout the next several hours, the chicken will release its natural juices, mixing with the melting cheese to create a rich, golden sauce. Resist the urge to peek; every time you lift the lid, you lose significant thermal energy and moisture.
Pro Tip: This phase relies on hydrolysis, where the heat and moisture work together to break down the long-chain proteins in the chicken, turning it from a firm texture to a "melt-in-your-mouth" consistency.
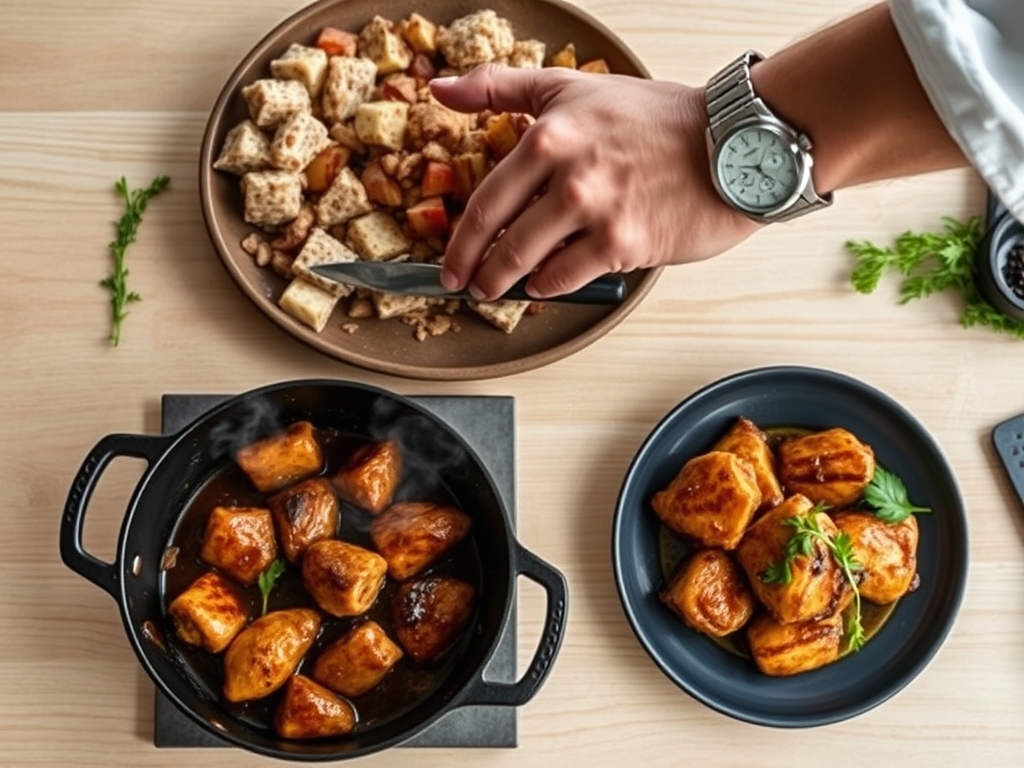
4. The Shred and Aerate
Once the timer sounds, use two forks or a sturdy pair of tongs to shred the chicken directly in the pot. The meat should pull apart with almost zero resistance. Once shredded, use a whisk or a large spoon to vigorously stir the chicken into the melted cheese and juices.
Pro Tip: Stirring vigorously helps to aerate the sauce and create a stable emulsion between the chicken fats and the dairy, resulting in a glossy, professional finish.
5. The Final Garnish
Fold in your crispy, rendered bacon bits and the shredded cheddar cheese. Replace the lid for five minutes to allow the cheddar to reach its melting point. Give it one final toss with a silicone spatula to ensure the bacon is distributed evenly.
Pro Tip: This final step utilizes carryover cooking. Even though the heat is off, the internal temperature of the sauce is high enough to melt the cheddar without breaking its delicate fat structure.
The Deep Dive
From a nutritional perspective, this dish is a powerhouse for those following a ketogenic lifestyle. It is high in healthy fats and protein while remaining exceptionally low in carbohydrates. For a vegan alternative, utilize a cashew-based cream cheese and soy-based "bacon" bits, though you may need to add a touch of cornstarch to achieve the same viscous consistency. If you are gluten-free, simply ensure your ranch seasoning blend does not contain anti-caking agents derived from wheat.
"The Fix-It": If your sauce looks "broken" or oily, whisk in a tablespoon of heavy cream or a splash of pasta water to re-emulsify the fats. If the dish is too salty, add a teaspoon of apple cider vinegar; the acid will mask the sodium perception. If it is too thick, thin it out with a splash of chicken bone broth. For meal prep, reheat your portions in a saucier over low heat with a tablespoon of milk. This prevents the microwave from "blasting" the dairy and causing the fats to separate.
The Wrap-Up
Mastering crack chicken recipes crockpot style is like having a secret weapon in your culinary arsenal. It is the perfect marriage of science and soul food. By understanding how fats emulsify and how proteins break down over time, you have elevated a simple slow-cooker meal into a gourmet experience. Whether you serve this over toasted brioche, tucked into a low-carb wrap, or straight out of the bowl, you are guaranteed a standing ovation. Now, go forth and conquer the kitchen; you have the skills to make every bite count!
The Kitchen Table
Can I use frozen chicken for this recipe?
It is safer to thaw chicken first. Frozen meat stays in the "danger zone" for bacterial growth too long in a slow cooker. For the best texture and safety, always start with fully defrosted poultry.
How do I prevent the sauce from being too runny?
Ensure you do not add extra water or broth at the start. The chicken releases significant moisture as it cooks. If it is still too thin after shredding, leave the lid off for 20 minutes on "High."
How long does crack chicken last in the fridge?
Stored in an airtight container, it remains delicious for up to four days. The flavors actually deepen overnight, making it a premier candidate for meal prepping. Reheat gently to maintain the creamy emulsion.
Can I make this in an Instant Pot instead?
Yes. Cook on high pressure for 15 minutes with a natural release for 10 minutes. Use the "Sauté" function at the end to thicken the sauce and melt the cheese after shredding the chicken.