
Imagine the sound of a heavy-bottomed skillet meeting a high-flame burner; it is the percussion of a perfect dinner. When you marry the deep, savory umami of seared protein with the molten, salty embrace of dairy, you are not just cooking. You are conducting a symphony of cheese and beef recipes that redefine comfort.
The secret to these pairings lies in the chemistry of fat and fermentation. Beef provides the iron-rich, muscular structure while cheese offers the acidic, creamy counterpoint that cuts through the richness. Whether it is a sharp cheddar melting into a medium-rare patty or a silky Gruyere folded into a braised short rib, the goal is always balance. We are looking for that specific moment where the fat renders out of the meat and emulsifies with the proteins in the cheese to create a sauce that is both viscous and vibrant. It is time to move beyond the basic cheeseburger and explore the sophisticated science of why these two ingredients are biologically destined to be together.
The Gathers:
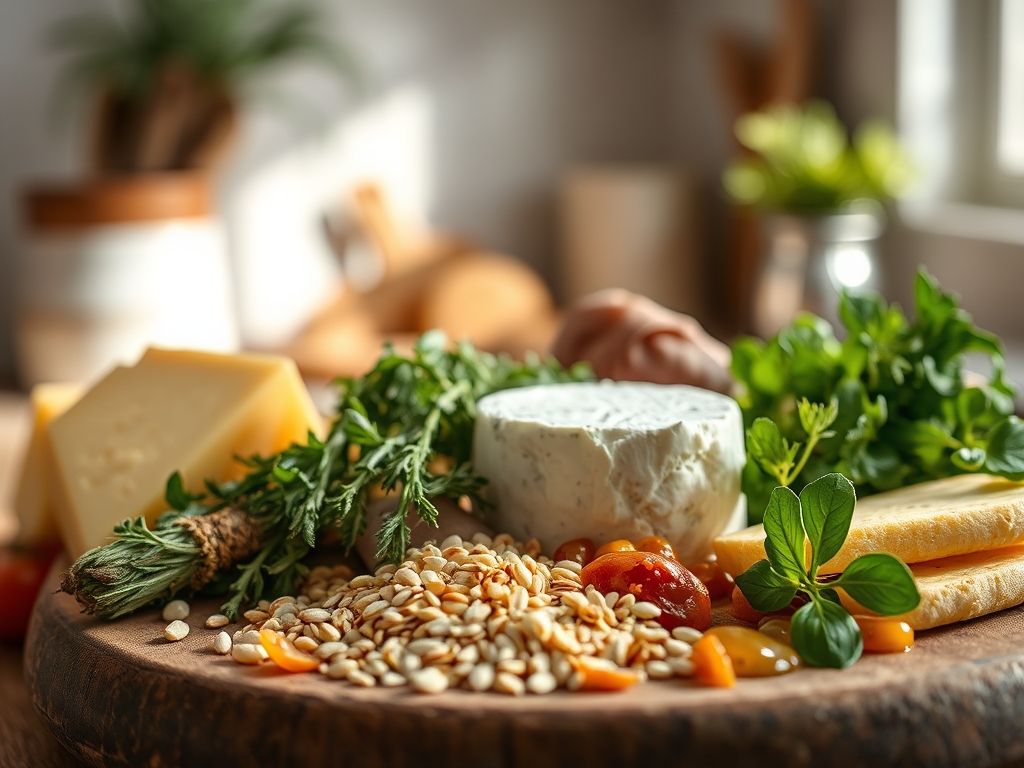
To execute these cheese and beef recipes with professional precision, your mise-en-place must be flawless. Start with your proteins; look for highly marbled cuts like ribeye or chuck roast, as the intramuscular fat provides the lubrication necessary for a tender mouthfeel. For the dairy, variety is your best friend. You will need a piquant blue for intensity, a nutty Fontina for meltability, and a sharp, aged Parmesan for that crystalline salt crunch.
Your tool kit is just as vital. Reach for a microplane to aerate your hard cheeses into fluffy clouds that melt instantly. Keep a digital scale nearby to ensure your ratios are exact; precision is the difference between a greasy mess and a velvety emulsion. You will also need a saucier for your cheese glazes and a bench scraper to manage your chopped aromatics.
Smart Substitutions:
If you find yourself without a specific alpine cheese like Comte, a high-quality Swiss or even a mild Provolone can fill the gap. For the beef, if you are looking to lighten the caloric load, lean top sirloin works beautifully as long as you do not overcook it. If you need a dairy-free alternative that still mimics the "pull," look for cashew-based ferments that utilize nutritional yeast for that essential savory profile.
The Clock:
Mastering the "Chef's Flow" is about managing thermal energy and time. For these six pairings, your total active prep time will hover around 35 minutes, while cook times vary from a 10-minute flash-sear to a 3-hour slow braise.
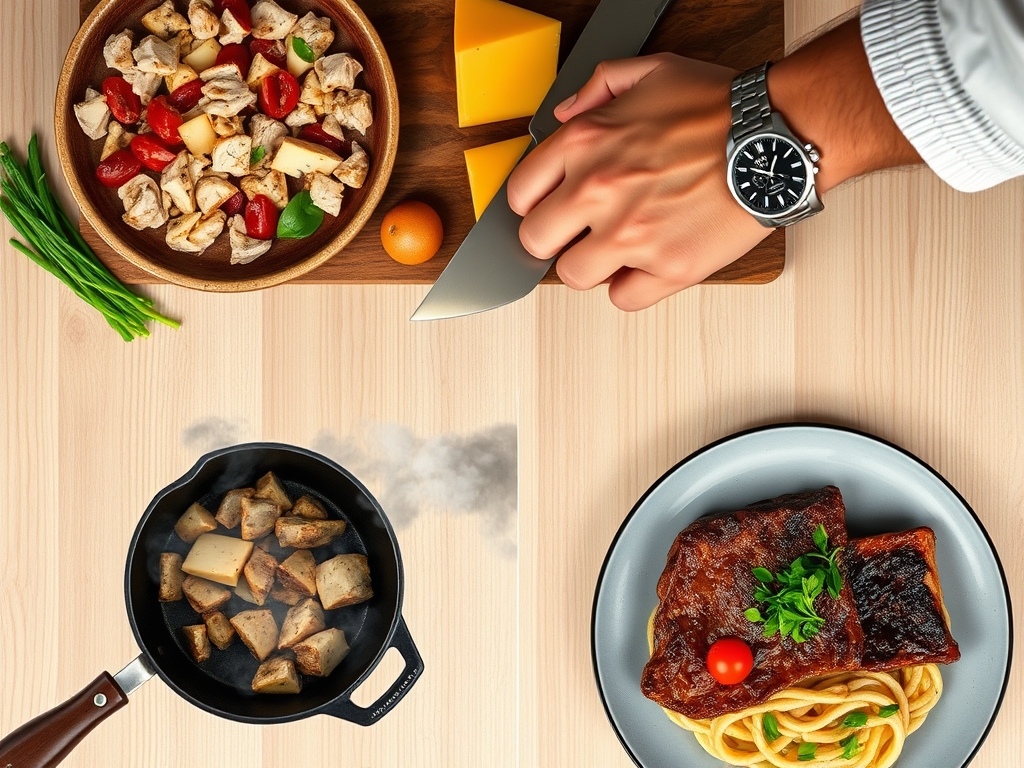
The flow begins with the "Cold Prep." Grate all your cheeses and chop your aromatics while the meat is still tempering on the counter. Never cook beef straight from the fridge; allowing it to reach room temperature ensures an even cook through the center. While the meat rests after cooking, that is your window to build your cheese sauces. This prevents the cheese from breaking or becoming grainy due to prolonged exposure to high heat.
The Masterclass:
1. The Maillard Sear
Pat your beef dry with a paper towel to remove surface moisture. Season aggressively with kosher salt and place into a ripping hot cast iron skillet. This creates the Maillard reaction; a chemical transformation where amino acids and reducing sugars create a complex, brown crust.
Pro Tip: This enzymatic browning only occurs above 285 degrees Fahrenheit. If your pan is crowded, the temperature drops, and the meat steams instead of searing.
2. The Deglaze
Once the beef is removed, you will see brown bits stuck to the pan. This is "fond," and it is pure flavor. Pour in a splash of dry red wine or beef stock and use a wooden spoon to scrape the bottom. This incorporates those caramelized proteins back into your base.
Pro Tip: Deglazing captures the concentrated essence of the meat, providing a robust acidic foundation that helps the cheese flavors pop later.
3. The Emulsion
Lower your heat significantly before adding cheese. Whisk in a knob of cold butter and your grated cheese slowly. Use a silicone whisk to keep the fats and solids suspended in a smooth, viscous liquid.
Pro Tip: High heat causes the protein clumps in cheese to tighten and squeeze out the fat, resulting in a "broken" oily sauce. Gentle residual heat is your best friend here.
4. The Infusion
Incorporate aromatics like fresh thyme, smashed garlic, or cracked black pepper during the final minutes of the sauce-making process. This allows the essential oils to bloom without burning.
Pro Tip: Fat is a flavor carrier. The lipids in the beef and cheese will absorb these aromatic compounds, distributing the scent and taste evenly across your palate.
5. The Rest and Carryover
Place your cheese-topped beef on a warm plate and let it sit for at least five to ten minutes. This allows the muscle fibers to relax and reabsorb their juices.
Pro Tip: Thermal carryover means the internal temperature of the beef will continue to rise by 5 to 10 degrees after leaving the pan. Pull your meat slightly before your target doneness to avoid overcooking.
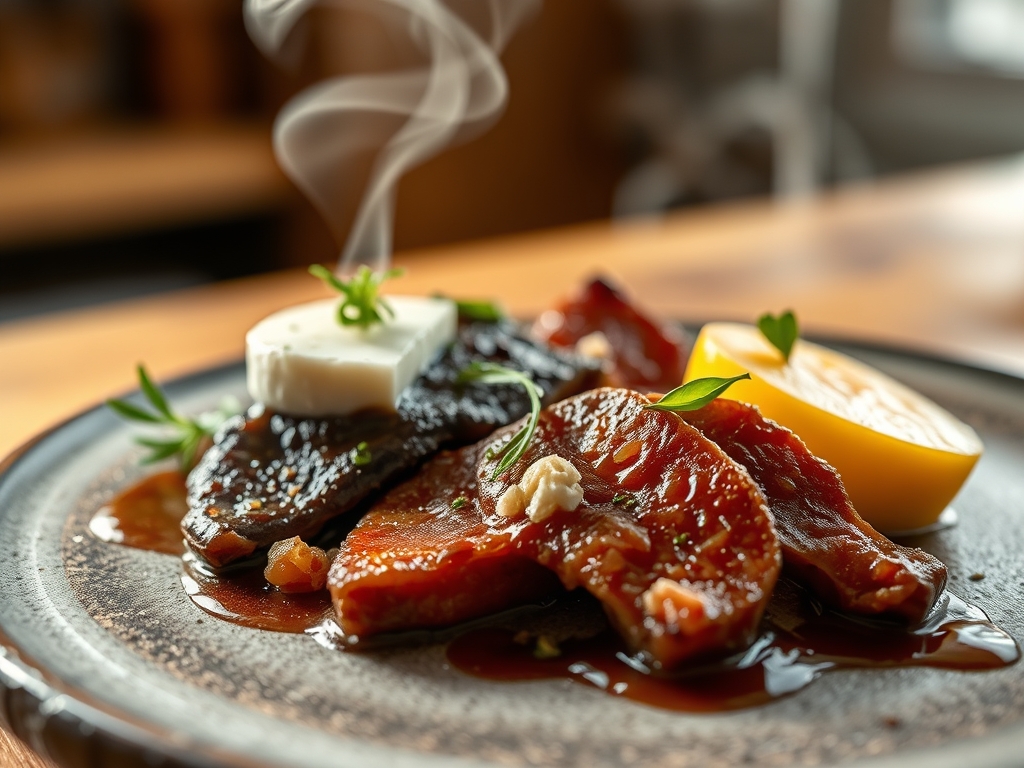
6. The Final Garnish
Finish with a hit of acid, like a squeeze of lemon or a sprinkle of microgreens, and a final dusting of microplaned hard cheese. This provides a fresh contrast to the heavy, savory notes of the dish.
Pro Tip: Visual contrast is just as important as flavor. The bright green of herbs against the deep brown of seared beef and the pale gold of melted cheese signals freshness to the brain.
The Deep Dive:
From a macro perspective, these cheese and beef recipes are powerhouses of protein and healthy fats. A standard serving typically provides 35 to 45 grams of protein, making it excellent for muscle recovery. For those following a Keto lifestyle, this is a dream pairing; just skip the starch. Gluten-free diners should ensure their beef stocks and pre-shredded cheeses do not contain hidden starches used as anti-caking agents.
The Fix-It:
- Grainy Sauce: This happens when the cheese is overheated. Fix it by adding a teaspoon of heavy cream and whisking vigorously off the heat.
- Tough Meat: You likely skipped the resting phase. If it is already sliced, drizzle with a bit of warm beef broth to rehydrate the fibers.
- Bland Flavor: You need more salt or acid. A dash of Worcestershire sauce or a splash of balsamic vinegar can wake up a flat dish instantly.
Meal Prep:
When reheating, avoid the microwave at all costs; it turns beef into rubber and cheese into plastic. Instead, use a low oven (275 degrees) and cover the dish with foil to trap moisture. This gentle reheating preserves the structural integrity of the fats.
The Wrap-Up:
There is a reason we crave the combination of a sharp blue cheese melted over a blackened steak or a gooey provolone draped across a Philly cheesesteak. It is a biological celebration of fat, salt, and fire. By understanding the science of the sear and the delicate nature of dairy emulsions, you elevate a simple meal into a gourmet experience. Now, grab your tongs, fire up that skillet, and let the kitchen fill with the scent of success.
The Kitchen Table:
Why does my cheese sauce always turn out oily?
This usually happens because the heat is too high. High temperatures cause the proteins to contract and expel the fat. Always melt your cheese over low, indirect heat and whisk constantly to maintain a stable emulsion.
Can I use pre-shredded cheese for these recipes?
It is better to grate your own. Pre-shredded varieties are coated in potato starch or cellulose to prevent clumping in the bag, which can lead to a gritty texture and prevent a smooth melt in your beef dishes.
What is the best way to get a crust on my beef?
Ensure the surface of the meat is bone-dry before it hits the pan. Moisture creates steam, which prevents the Maillard reaction. Use a high-smoke-point oil and do not move the meat until it releases naturally from the pan.
How do I know when my beef is perfectly cooked?
Use a digital meat thermometer. For a medium-rare finish, pull the beef at 130 degrees Fahrenheit. The temperature will rise to the perfect 135 degrees during the resting phase due to thermal carryover.