
Picture the first afternoon where the air loses its bite and smells like damp earth and possibility. You are standing in a sun-drenched kitchen; the windows are cracked open; and you have a stack of vibrant produce that actually tastes like something. This is the seasonal pivot where we trade heavy braises for the brightness of chicken recipes spring. We are moving away from the slow-cooker sludge and toward the crisp snap of asparagus and the piquant zing of lemon. Spring cooking is about speed and clarity. It is about honoring the protein without burying it in cream. Whether you are searing a cutlet to golden perfection or poaching a breast in a fragrant bath of herbs; the goal is a meal that feels as light as the longer days ahead. We are going to master the art of the quick-fire dinner using ten distinct flavor profiles that celebrate the garden. From honey-lavender glazes to sharp radish salsas; these dishes are designed to be effortless yet technically superior. Let us get your apron on and your skillet hot.
The Gathers:
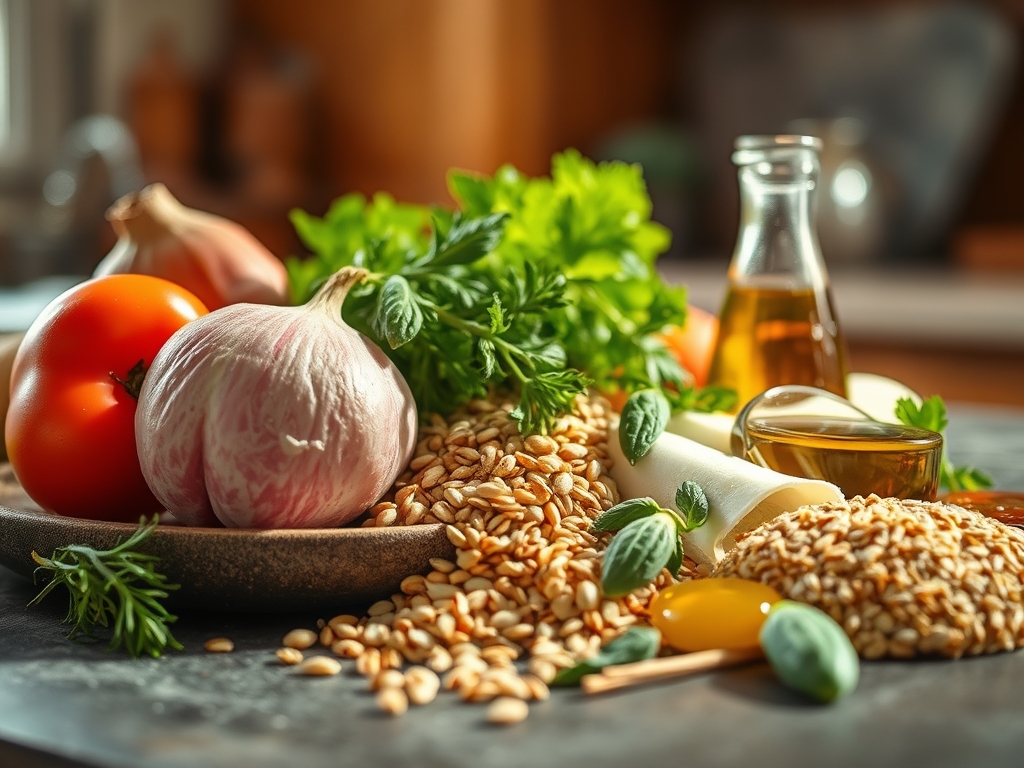
To execute these chicken recipes spring; your mise-en-place must be a study in texture and acidity. Start with your protein: organic; air-dried chicken breasts or thighs. Air-dried poultry has less water retention; which means you get a superior Maillard reaction when the meat hits the pan. You will need a bouquet of soft herbs: dill; chives; and tarragon. These contain volatile oils that dissipate under high heat; so we treat them as finishing elements.
For the aromatics; gather spring onions and green garlic. Unlike cured garlic; green garlic is mild and almost nutty; providing a base that does not overwhelm the palate. You will also need high-quality fats. Reach for a cold-pressed olive oil for finishing and a high-smoke-point avocado oil for the initial sear. Finally; gather your brighteners: lemons; limes; and a bottle of dry white wine like a Sauvignon Blanc to deglaze your pans.
Smart Substitutions: If you cannot find ramps or green garlic; use the white parts of scallions mixed with a tiny clove of crushed garlic. If you are avoiding alcohol; a splash of verjus or a white balsamic vinegar diluted with water provides that necessary acidic backbone without the ethanol. For a dairy-free creamy element; whisking a tablespoon of tahini into your pan sauce creates a viscous emulsion that mimics heavy cream perfectly.
The Clock:
Timing in a professional kitchen is referred to as the "Chef's Flow." For these spring dishes; your active prep time should never exceed twenty minutes. The secret is the sequential workflow. You start by tempering your meat; bringing it to room temperature for at least fifteen minutes. While the protein tempers; you perform your knife work. Use a sharp chef's knife to slice your vegetables into uniform shapes; ensuring they cook at the same rate.
The actual cook time for a standard 6-ounce chicken breast over medium-high heat is approximately twelve to fourteen minutes. However; the most critical part of your clock is the resting phase. You must allow the meat to rest for at least five minutes before slicing. This allows the muscle fibers to relax and reabsorb the juices; preventing a dry; chalky texture. Total time from fridge to table? Thirty-five minutes.
The Masterclass:
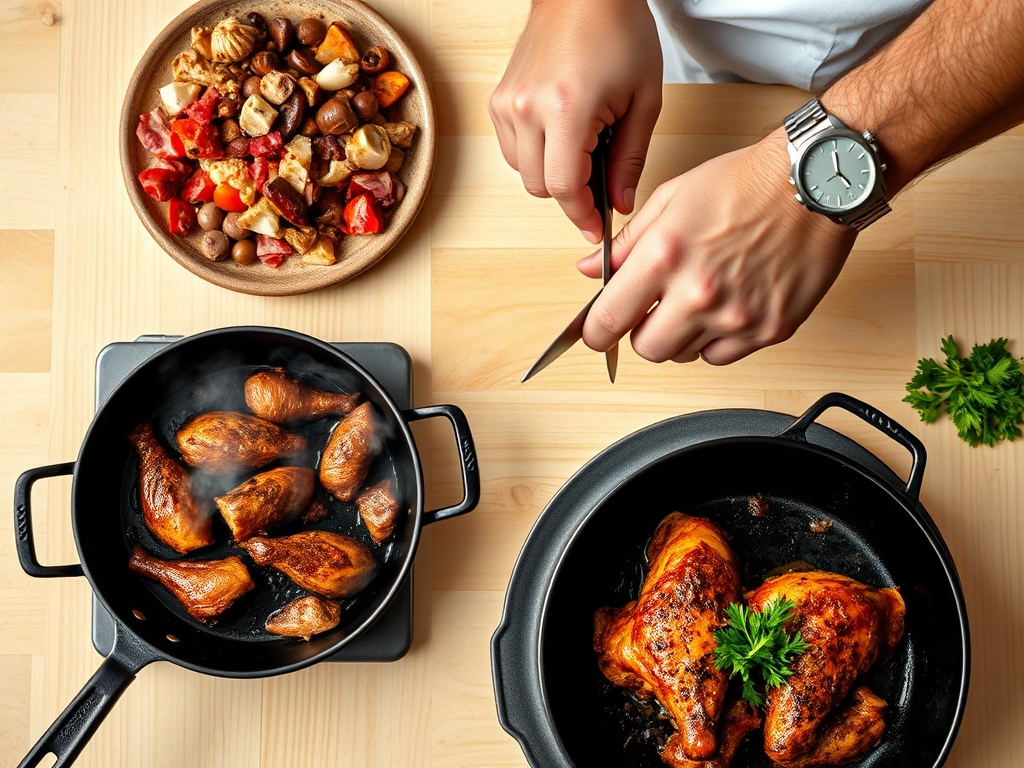
1. The Temper and Sear
Remove your chicken from the refrigerator and pat it bone-dry with paper towels. Moisture is the enemy of a crisp crust. Season aggressively with kosher salt from a height of ten inches to ensure even distribution. Heat a heavy-bottomed skillet until the oil shimmers. Lay the chicken away from you to avoid oil splatter. Do not move it for four minutes.
Pro Tip: This stillness allows for enzymatic browning. Moving the meat too early tears the protein bonds before they have caramelized; leaving your chicken grey and stuck to the pan.
2. The Deglaze and Infuse
Once you flip the chicken; toss in your spring aromatics like sliced leeks or peas. As the chicken finishes cooking; pour in half a cup of white wine or stock. Use a stainless steel whisk or wooden spoon to scrape up the brown bits (the fond) from the bottom of the pan.
Pro Tip: This process is called deglazing. The liquid captures the concentrated protein sugars and incorporates them into a complex sauce that coats the back of a spoon.
3. The Emulsion Finish
Turn off the heat. This is crucial. Add a knob of cold butter or a splash of heavy cream to the pan. Swirl the skillet vigorously. The goal is to suspend the fat particles within the water-based sauce.
Pro Tip: This creates a stable emulsion. Adding fat to a boiling liquid causes it to "break" or separate; resulting in an oily mess. Residual heat is all you need for a silky finish.
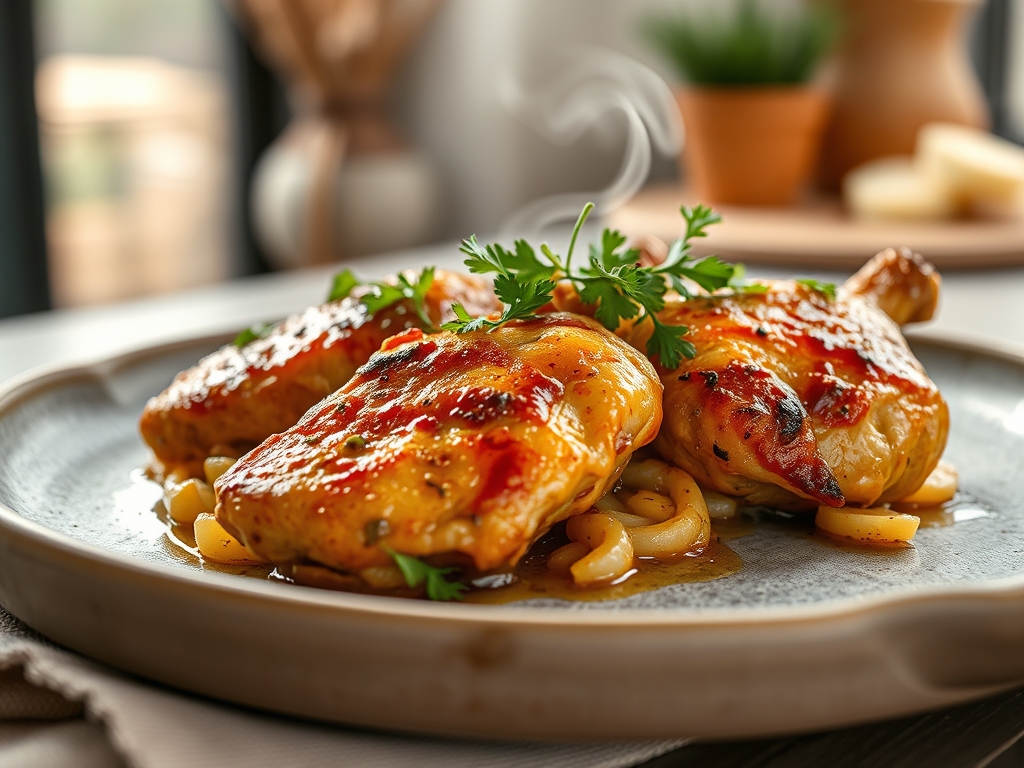
4. The Herb Aeration
Just before serving; use a microplane to zest a fresh lemon over the dish and shower it with your chopped soft herbs. The heat from the chicken will release the essential oils without cooking the life out of the greens.
Pro Tip: This is known as aerating the aromatics. High heat destroys the delicate flavor compounds in herbs like cilantro and parsley; so always add them at the very last second for maximum impact.
The Deep Dive:
When we look at the macro nutrition of these chicken recipes spring; we see a powerhouse of lean protein paired with high-fiber seasonal greens. A standard serving provides roughly 35 grams of protein and less than 10 grams of fat; depending on your sauce.
Dietary Swaps: For a Keto version; swap the wine for extra broth and increase the butter or heavy cream. For Vegan guests; replace the chicken with thick slabs of cauliflower or oyster mushrooms; which have a similar "meaty" texture when seared. For Gluten-Free needs; ensure your chicken stock is certified and use cornstarch or arrowroot powder if you need to thicken your sauce.
The Fix-It:
- Rubbery Chicken: This happens when you overcook it. Use a digital meat thermometer and pull the chicken at 160 degrees Fahrenheit. Thermal carryover will bring it to the safe 165 mark while it rests.
- Broken Sauce: If your sauce looks oily; add a teaspoon of warm water and whisk violently. The water helps re-bind the emulsion.
- Bland Flavor: You likely need more acid; not more salt. A squeeze of lemon juice or a drop of vinegar will "wake up" the other flavors.
Meal Prep: To reheat chicken without it becoming "rubbery;" avoid the microwave. Place the chicken in a shallow pan with two tablespoons of water or broth; cover with foil; and warm in a 300-degree oven. This creates a mini-steamer that preserves the moisture levels.
The Wrap-Up:
Spring is the ultimate season for culinary reinvention. By mastering these foundational techniques; you transform a simple chicken breast into a restaurant-quality masterpiece. Remember to focus on the sear; respect the rest period; and never underestimate the power of a fresh lemon. These chicken recipes spring are your ticket to a lighter; brighter; and more delicious weeknight routine. Now; go turn on that stove and let the kitchen smell like sunshine.
The Kitchen Table:
How do I get crispy skin every time?
Ensure the skin is bone-dry before cooking. Use a heavy-bottomed skillet and start the chicken skin-side down in a cold pan; gradually raising the heat to render the fat slowly. This results in a glass-like; golden texture.
Can I use frozen chicken for these recipes?
Yes; but you must thaw it completely in the refrigerator first. Pat it dry thoroughly to remove excess moisture; otherwise; the chicken will steam in the pan rather than sear; leading to a lack of flavor and poor texture.
What is the best way to store leftovers?
Place chicken in an airtight glass container within two hours of cooking. Keep it in the coldest part of your fridge for up to four days. For the best quality; store the sauce separately to prevent the meat from becoming soggy.
Why does my chicken always turn out dry?
You are likely skipping the resting phase. Slicing meat immediately after cooking allows all the internal juices to escape onto the cutting board. Wait five minutes; and the juices will stay locked inside the muscle fibers for a moist bite.