
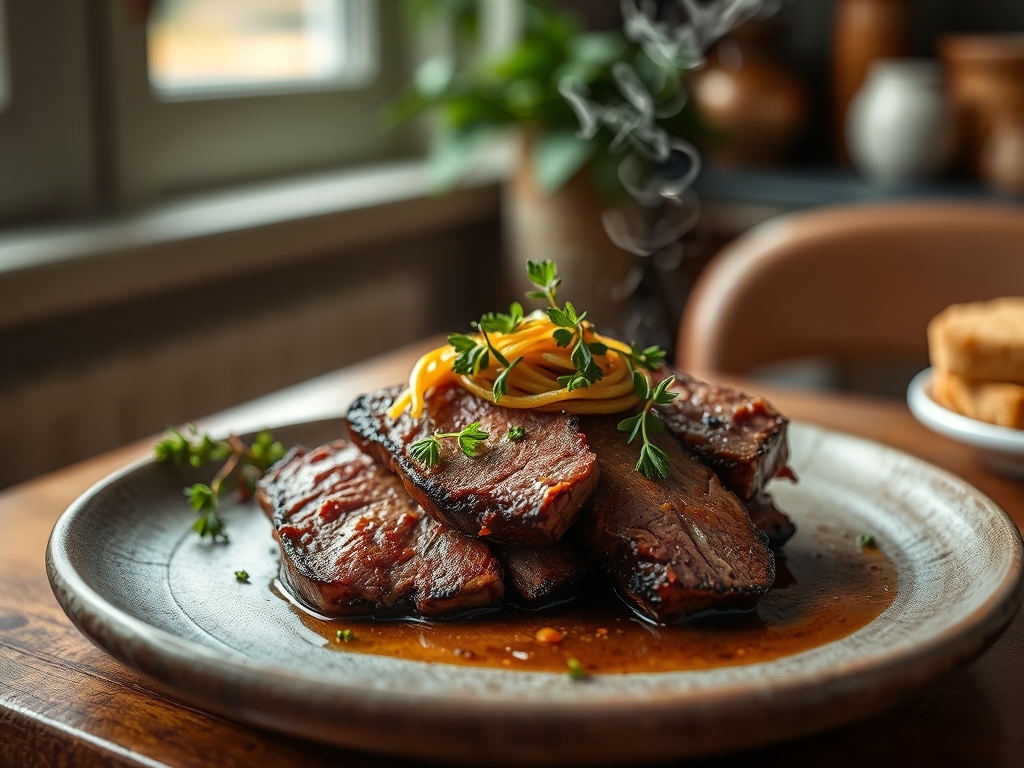
Picture the steam rising from a heavy ceramic plate as a fork glides through fibers of beef that barely offer resistance. That specific, comforting aroma of slow-simmered onions and deep, savory gravy is the hallmark of cracker barrel roast beef recipes. It is a dish that feels like a warm hug from a Southern grandmother who also happens to have a PhD in flavor chemistry. Achieving that level of tenderness at home requires more than just a slow cooker; it requires an understanding of how collagen transforms into silk. We are going to deconstruct the mystery of the ultimate pot roast, moving beyond basic instructions into the realm of professional culinary execution. This is not just dinner; it is a masterclass in moisture retention and flavor layering that will turn your kitchen into the best seat in the house.
The Gathers:
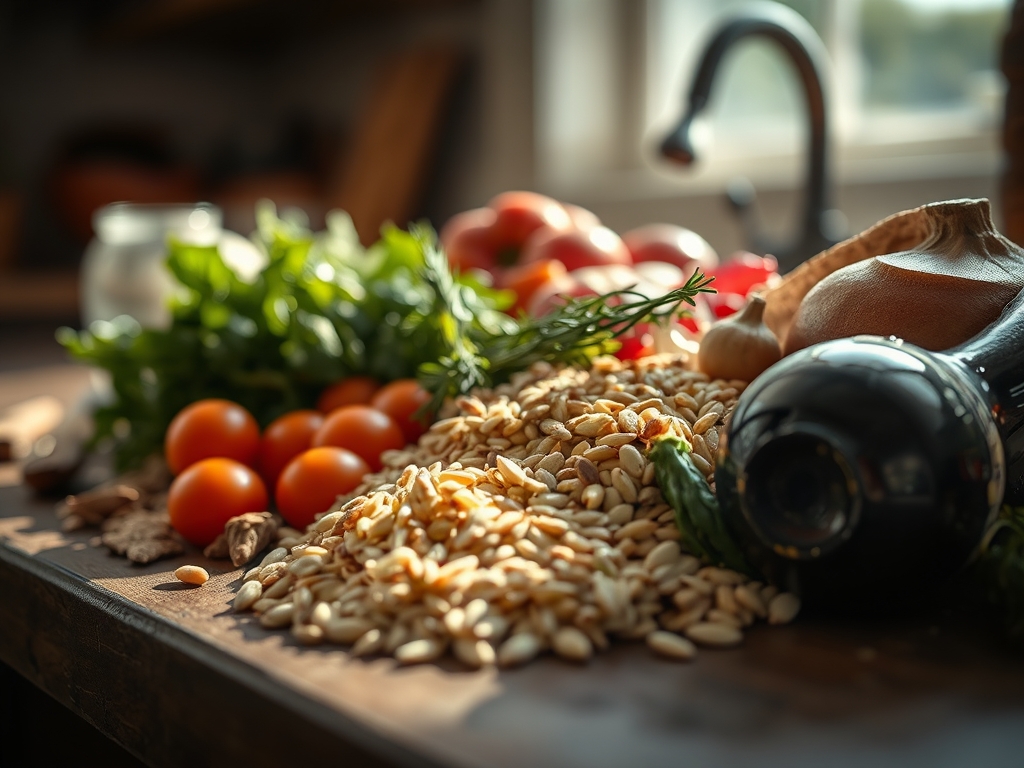
To replicate the iconic profile of cracker barrel roast beef recipes, your mise-en-place must be precise. Start with a three to four pound chuck roast. This specific cut is non-negotiable because it contains the intramuscular connective tissue known as collagen, which breaks down into gelatin during the long braise. You will also need high-quality beef stock, yellow onions, carrots, and celery. For the flavor base, gather garlic, dried thyme, and bay leaves.
The secret to that "restaurant-style" depth is the addition of a piquant element like Worcestershire sauce or a splash of red wine vinegar to brighten the heavy fats. You will need a heavy-bottomed skillet for the initial sear and a digital scale to ensure your salt ratios are exact. For the thickening stage, have cornstarch or flour ready to create a viscous gravy.
Smart Substitutions: If you are avoiding nightshades, swap traditional potatoes for parsnips or celery root. If you lack a chuck roast, a bottom round or rump roast can work, though they are leaner and require a slightly lower temperature to prevent the muscle fibers from tightening. For a deeper umami punch, use a microplane to grate a single anchovy fillet into the braising liquid; it melts away entirely but adds a massive savory foundation.
The Clock
Efficiency in the kitchen is about the Chef's Flow. Expect to spend 20 minutes on active preparation. This includes trimming excess external fat, dicing your aromatics with a sharp chef's knife, and searing the protein. The "passive" phase is where the magic happens. If using a slow cooker, set aside 8 hours on low or 4 hours on high. If using a Dutch oven in a conventional oven, plan for 3 to 4 hours at 300 degrees Fahrenheit.
The flow begins with the sear, followed by the deglaze, and finally the long simmer. Never rush the cooling phase. Allowing the meat to rest for 15 minutes before shredding prevents the internal juices from flashing off as steam, ensuring every bite remains succulent.
The Masterclass
1. The Temper and Sear
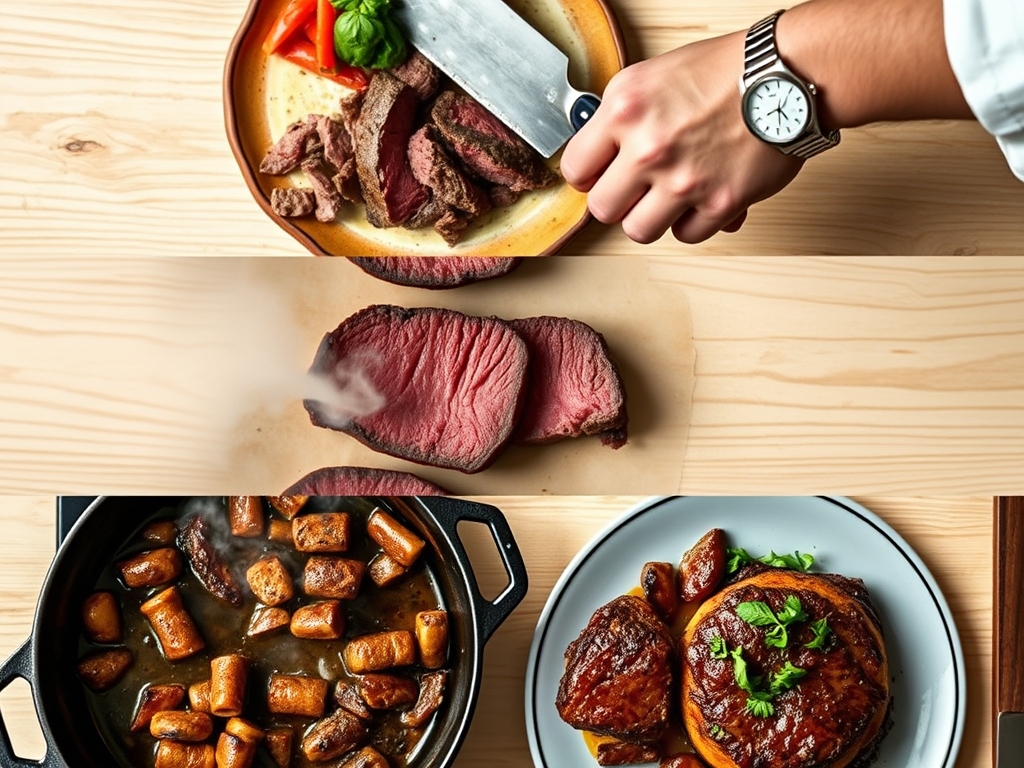
Remove your beef from the refrigerator 30 minutes before cooking to bring it toward room temperature. Use a paper towel to pat the surface bone-dry. Season aggressively with kosher salt. Heat oil in your heavy-bottomed skillet until it reaches the smoke point, then use tongs to sear every side of the roast until a deep brown crust forms.
Pro Tip: This process is called the Maillard reaction. By browning the surface, you are creating hundreds of different flavor compounds that do not exist in raw meat. If the surface is wet, the meat will steam rather than sear, robbing you of that essential savory depth.
2. The Deglaze and Aromatics
Remove the meat and set it aside. Add your onions, carrots, and celery to the hot fat remaining in the pan. Use a wooden spoon to scrape up the brown bits (the fond) from the bottom of the pan. Add a splash of stock or wine to help loosen these flavorful particles and infuse them into the vegetables.
Pro Tip: Deglazing captures the concentrated protein sugars stuck to the pan. This step is the difference between a thin, one-note broth and a complex, professional-grade gravy.
3. The Low and Slow Braise
Place the meat and vegetables into your cooking vessel. Pour in your beef stock until the meat is about two-thirds submerged. Add your herbs and a dash of Worcestershire sauce. Cover tightly to prevent moisture loss.
Pro Tip: Maintaining a temperature between 190 and 200 degrees Fahrenheit is critical. This is the "sweet spot" where collagen denatures into gelatin. If the liquid boils too violently, the muscle fibers will contract and become "stringy" rather than tender.
4. The Reduction and Emulsification
Once the meat is fork-tender, remove it from the liquid. Strain the solids or leave them in, depending on your preference. Pour the liquid into a saucier and simmer. Whisk in a slurry of cornstarch and cold water to thicken the sauce until it coats the back of a spoon.
Pro Tip: This is a physical change where starch granules swell and trap water molecules, creating a viscous texture. This ensures the flavor clings to the meat instead of pooling at the bottom of the plate.
The Deep Dive
Macro Nutrition: A standard 6-ounce serving of this roast beef provides approximately 350 calories, 38 grams of protein, and 18 grams of fat. It is a powerhouse of iron and Vitamin B12. To keep it Keto, omit the potatoes and use xanthan gum instead of flour for the gravy. For a Vegan alternative, use large chunks of "Lion's Mane" mushrooms or seitan, though the cooking time will be significantly reduced.
The Fix-It:
- Tough Meat: If the beef is still chewy, it simply hasn't cooked long enough. Put it back in. The collagen needs time to melt.
- Salty Gravy: Do not panic. Add a peeled, halved potato to the liquid and simmer for 15 minutes; the potato acts as a sponge for excess salt.
- Greasy Surface: If the gravy has a layer of oil, use a wide spoon to skim the surface or chill the liquid so the fat hardens for easy removal.
Meal Prep: To maintain "day-one" quality, store the beef submerged in its gravy. When reheating, use a low power setting on the microwave or a covered skillet on the stove. This prevents the proteins from overcooking and becoming rubbery. The gelatin in the gravy will melt back into a liquid, re-hydrating the meat fibers from the inside out.
The Wrap-Up
Mastering cracker barrel roast beef recipes is a rite of passage for any home cook looking to dominate the comfort food category. By focusing on the Maillard reaction during the sear and the gentle breakdown of collagen during the braise, you elevate a humble cut of meat into a centerpiece. Remember to respect the rest time and never skip the deglazing step. Now, grab your tongs, fire up the stove, and prepare to serve a meal that will have everyone asking for your secret "restaurant" recipe. You have the science; now go make the magic.
The Kitchen Table
What is the best cut of meat for roast beef?
The beef chuck roast is superior because of its high fat and connective tissue content. During a slow braise, these elements melt, providing a self-basting mechanism that results in the signature "fall-apart" texture found in classic Southern recipes.
How do I make my gravy thicker?
Create a slurry by mixing equal parts cold water and cornstarch. Whisk this into the simmering braising liquid. The starch granules will aerate and expand, creating a thick, glossy consistency that clings perfectly to the meat and vegetables.
Can I cook this recipe in a pressure cooker?
Yes. Use the "Manual" or "Pressure Cook" setting for 60 to 80 minutes with a natural release. While faster, ensure you still sear the meat first to develop the complex flavor compounds necessary for a rich, dark gravy.
Why is my pot roast dry even with liquid?
If the meat is dry, it likely boiled at too high a temperature. High heat causes muscle fibers to wring out their internal moisture like a sponge. Keep the temperature low and slow to ensure the gelatin keeps the fibers hydrated.